How to Make Perfect Food Gifts in a Jar
Make the Very BEST and Most Beautifully Layered Gifts in a Jar with Expert Tips, Tricks and Instructions...
Delicious, layered homemade gifts in a jar make fun, easy and thoughtful gift ideas. They look beautiful and they make a tasty dessert or dish for your recipient to enjoy at their leisure.
If this is your first time time putting together a homemade gift in a jar, or if you're simply looking for tips to help you make the most beautiful layered jar gifts possible, you'll find the following especially helpful...
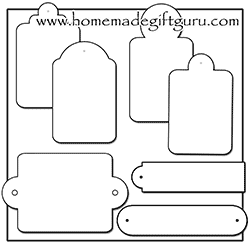
When you're ready, I also have a collection of recipes in a jar for your gift giving use, as well as free gift tag templates that work well for attaching recipes and instructions or for printing "To" and "From" info with the special Greeting of your choice.
How to Make Layered Gifts in a Jar...
Choose Your Recipe. Whether you'll be making your own gift jar recipes or using someone else's, it's helpful to keep the following in mind:
- Choose a recipe that is made for the size jar you are using. Most recipes in a jar will be sized to fit a one quart or one liter canning jar but there are also other sizes that are used occasionally.
- Layered mixes should be specifically formulated so that you can pack in the contents and they will fill the jar. If you add up all the ingredient amounts, you will likely find a total greater than 4 cups (the size of a quart). However, when packed down fully, the ingredients should fit nicely.
- Non-layered mix recipes are also available. You can blend the dry ingredients of any standard mix and pack it into a jar, bag or other container.
Fill Container. Filling your jar or container with a mix is basically as easy as following the directions. Here are a few things to consider that will ensure a clean, beautiful looking mix.
- Always use fresh ingredients. Buy fresh ingredients and check the expiration date of things you keep around like baking soda, powdered milk and baking powder. These items should be good for the next 6 or more months.
- Add each layer in the order it is listed or as directed. Use a canning funnel (or a sheet of paper rolled into a funnel) to add ingredients.
- Use wide mouth jars as opposed to regular caning jars. This makes the packing and layering process work best.
Note: It's your choice whether to include an expiration date but it may be helpful for some people, in case they don't get around to making the dish right away. If fresh ingredients were used and the mix is stored in a cool dark place, it should remain good for up to 6 months. Recipes with nuts however, have a shelf life of about 3 months.
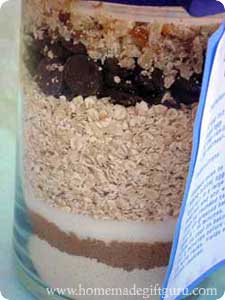
Pack Down Layers. Be sure to press down each layer before adding the next. Loose layers will start to mix together and look messy. Packing down each layer will also ensure a good fit. Use the flat bottom of a small glass or bottle, a large spoon, a tart tamper (if you have one) or any other flat utensil that will fit down into your jar.
- Alternate Layers by Color. When layering jar contents, it's important to alternate the color and/or texture of each layer. For example, white sugar --> brown sugar --> white flour --> brown cocoa. Make sure your recipe follows these guidelines.
- Layer Fine Ingredients Below Large. You may also want to put fine ingredient like white granulated sugar below large ingredients like candy, oats, fruit or nut pieces. This way, the finer ingredients won't sift down between the larger pieces and cover them up. The layers don't have to be prefect but you want them to stay separated as designed.
Tip: Pack brown sugar and any other fluffy substances extra well to give room for other ingredients.
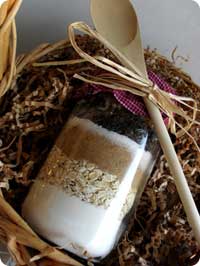
Embellish and Label. There are many options for embellishing and labeling gifts in a jar.
- Create Instructions. No matter what recipe you choose, your recipient will need to know additional ingredients and how to prepare the mix. You can write out directions in your personal handwriting or type them on the computer and print them.
Tip: Some people also choose to include a list of ingredients used in the jar gift (either for allergy reasons or with measurements so the recipient can make the dish again in the future). - Attach Instructions. You can print or glue the recipe ingredients and instructions onto a card or tag and attach the tag with ribbon. For even simpler gifts in a jar, you can glue instructions directly on the jar or container. Again, here are some gift tag templates that might come in handy.
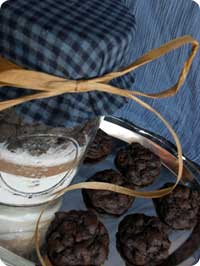
- Embellish Jar. This is an additional step you can take if you choose. For a super simple approach, simply tie ribbon around the neck of the jar. Or you can cut a round of fabric and place it on top of the jar, securing it with ribbon, craft cord, thin rope or yarn. You can also cut out a round piece of cloth and nest it between the lid and the ring of a mason jar. If you wish, you can embellish to your hearts content with beads, buttons, charms, stickers, decals or small keepsakes like a wooden spoon, cookie cutters or a spatula. Gifts in a jar can be decorated as simple or as fancy as you choose.
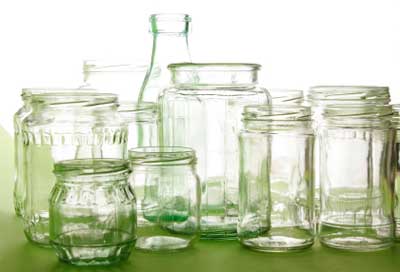
Need Jars?...
You may also like to read about Jars for Homemade Jar Gifts for a few fun and frugal tips for finding, using and reusing great glass for a variety of homemade jar gifts.
What can go in a jar? You might be surprised by some of these gift jar ideas...
Reader Question... Pint-size mason jar recipe?
Related Pages...
Search This Site!

Recent Articles
-
Herb Wreath
Apr 10, 24 02:48 PM
 Learn how to make a fragrant herb wreath for a fun handmade gift right from your garden...
 -
Sock Crafts: Sock Bunny Kits
Mar 21, 24 07:34 PM
 Share the fun of sock crafts by making some of these DIY sock bunny kits! Free printable included.
 -
Easter Printables
Mar 14, 24 08:55 PM
 Print these Easter gift tags for the perfect touch to your homemade Easter gifts. These Easter printables are perfect for baskets, jar gifts, treats and more!