How to Tie Dye Shirts & More Using an Easy Circle Tie Dye Technique
Create AWESOME Tie Dye Patterns the Easy Way
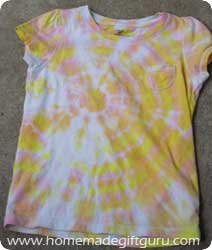
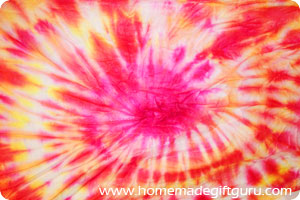
If you are looking for a super fun and EASY way to tie dye shirts and other stuff, this circle tie dye technique is the way to go. Look at it... it literally radiates fun!
The traditional 60s style spiral tie dye technique is fun too, but it's a little tricky and harder to know how it will turn out. Try this circle binding technique for an easy to do and much more predictable tie dye project.
This tie dye technique is great for homemade gifts. The colors radiate out (a little like the spiral technique) yet binding the fabric this way, is simple enough for kids to do.
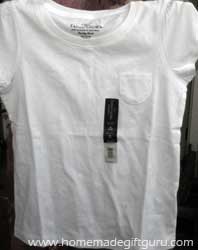
By the way, this super cute plain white girl's t-shirt was only $2.88 (try Walmart or Target), making it a high quality but still thrifty homemade gift idea.
You can also shop thrift stores and even craft stores for great deals on plain white shirts and other garments to tie dye.
I use my favorite cold water tie dye supplies (learn more about them here) because they create high quality, vibrant tie dye projects.
If you are just learning how to tie dye, feel free to also check out these tips, tricks and step-by-step tie dye instructions.
How to Tie Dye Using an Easy Circle Technique...
Step 1. Garment Preparation
Preparing your garments properly is a very important part of creating a tie dye shirt with great results. Here's how to prepare your garments for cold water tie dye.
- Gather Garments. Choose white clothes or light colored clothing, 100% cotton, linen and rayon are best.*
- Pre-Wash Fabrics. Always pre-wash your fabric according to fabric directions. Do not use fabric softeners or dryer sheets.
- Soak in Fixer. Soak your clothes for 30 minutes in soda ash water (wearing gloves, stir in 1 cup soda ash per 1 gallon of water). Soda ash is a dye fixer that I highly recommend. Using soda ash water will help your dye to bind well with the fabric for high quality results.
For more info about the above steps you can check out my write up on tie dye supplies, as well as these tie dye instructions.
While your fabrics soak, the next step in these tie dye shirt instructions is to prepare your work space.
Step 2. Prepare Work Space
Protect Work Surface. Lay out plastic trash bags or sheeting (I like to cut kitchen trash bags open, lay them flat and tape down the edges).
Step 3. Bind Fabric Using this Circle Binding Technique
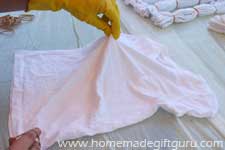
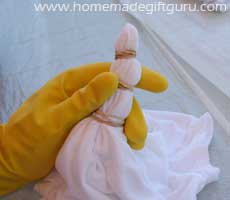
Pinch Center of Design. First determine where on your tie dye shirt you want the center of the circle to radiate from. Pinch this spot and bind a circle of fabric there with a rubber band. Use glove to touch fabric that is soaked in soda ash water.

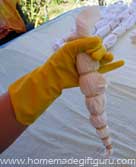
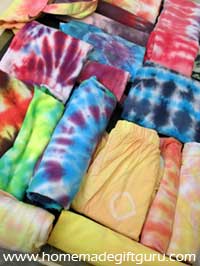
Bunch and Bind. Now continue to bunch and bind the fabric at even intervals. Or not even... it's that easy!
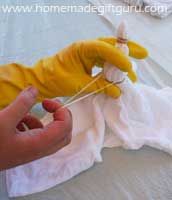
The circle will start where you made your first bind and continue to radiate outwards from there.
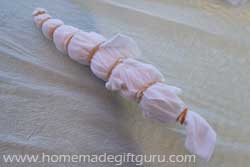
Bind until you run out of fabric to bind. You can do this with just about any garment you want.
Step 4. Prepare Dye
Preparing your dye is done after garment preparation, because it's a good idea to wait to prepare your dye until after your garments are bound and ready for tie dying. This is just a handy precaution because dye has a way of getting around... and you don't want to accidentally transfer any onto your clean white fabrics before you are ready to do so!
Prepare Dye. Follow the instructions on your dye for preparation. Procion MX dye requires 2 teaspoons of powdered dye to be added to 8 oz of water. For lighter colors you can add more water if desired. You can apply dye using a squeeze bottle to squeeze it where desired or by pouring it from a cup onto desired area. Both work but squeeze bottles provide a little more control, plus they are easier to mix (simply shake well).
Tip:
It's also a good idea to mix your dye in a place away from your fabrics
and work area to avoid specks of powder from blowing over onto your
projects or your work space.
Safety Precaution: To avoid
skin and eye irritation, it is recommended that you use rubber gloves
during the dying process and do not ever breath powdered dye dust (use
dust mask when adding powdered dye to water if possible). Always work
with dyes and other chemicals in a well ventilated area.
Step 5. Dye Fabric
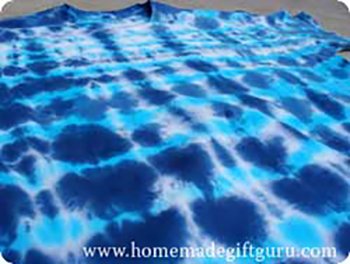
Squeeze or pour dye as desired. Apply dye in the pattern of your choice. Alternate colors however you like.
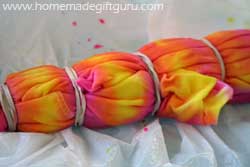
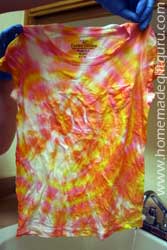
Below you see the first color of dye applied right on the bindings and the second color of dye applied between each binding. I used bubble gum pink and a light yellow to create this tie dye shirt for a young girl.

Apply dye however you like and use as little or as many
colors
as you want! Apply plenty of dye to soak throughout the fabric. Keep in
mind that two colors next to each other are likely to blend together.
Tip: Kitchen trash bags work AWESOME to both contain the mess as you dye and then to wrap your project in afterward.
Step 6. Cover Fabric and Allow Dye to Set
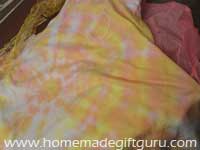
Cover Project. Keep garments damp by covering in plastic. Some people use gallon sized zip lock bags or simply plastic wrap. In this case, you can enclose the fabric right in the plastic kitchen bag, pushing out any air and twisting the bag up securely.
Tip... You may want to put your bagged projects together in an additional plastic kitchen trash bag (to be safe in case of a leak and to keep them all together).
Let Set. Allow fabrics to sit undisturbed for 24 hours. 24 to 48 hours
actually! Allowing the fabric to "bake" is important if you want vibrant tie dye results.
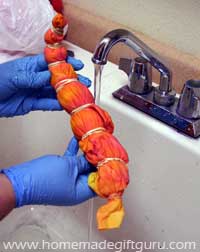
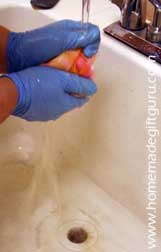
Step 7. Rinse in Warm Water
Rinse garments in warm water to remove excess dye. Remove any rubber bands as you continue to rinse. Rinse until water runs nearly clear.
If rinsing multiple garments... When you're done rinsing each garment, put rinsed fabric on a clean plastic bag (or other plastic) and never let your various projects lay against each other at this stage, the dye will transfer at this point.
8. Wash and Dry Fabric
Wash Fabric. The last step in these tie dye instructions will be to machine wash (or hand wash if the fabric requires hand washing) fabric in hottest water suitable for fabric.
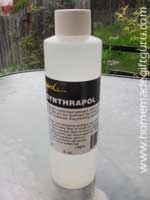
I recommend using Synthrapol, an industrial strength neutral detergent that suspends the dye particles so they don't bleed back onto your fabrics. This is how you keep all your colors where you want them (white stays white and even bright colors keep to themselves).
Learn more about this tie dye supply and more here.
Important Tip: Be aware that wet tie dyed fabrics resting against each other or other fabrics still have a chance of transferring color. Take them right out of the wash when done and dry immediately.
Dry Fabrics. After washing your tie dyed fabrics, machine or line dry as desired.
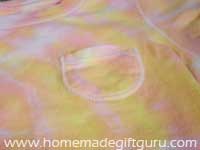
This tie dye shirt was died using bubble gum pink and a light yellow, so cute for a young girl!
That's it!
Going Beyond Tie Dye Shirts...
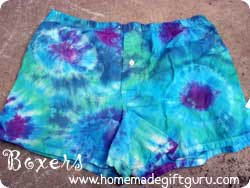
I hope you make some AWESOME tie dye shirts and other garments. Her's a few more ideas for what to tie dye for unique homemade gift ideas...
- boxer shorts
- pillow cases
- socks
- bandanas
- tote bags
- tank tops
- baby onesies (such a cute homemade gift idea!)
The next time you make a fun homemade gift using tie dye... share the fun with other readers in the HMGG inspiration gallery!
Related Pages...
Search This Site!

Recent Articles
-
Herb Wreath
Apr 10, 24 02:48 PM
 Learn how to make a fragrant herb wreath for a fun handmade gift right from your garden...
 -
Sock Crafts: Sock Bunny Kits
Mar 21, 24 07:34 PM
 Share the fun of sock crafts by making some of these DIY sock bunny kits! Free printable included.
 -
Easter Printables
Mar 14, 24 08:55 PM
 Print these Easter gift tags for the perfect touch to your homemade Easter gifts. These Easter printables are perfect for baskets, jar gifts, treats and more!