Spiral Tie Dye T Shirts & More
Learn How to Tie Dye T Shirts, Scarves, Tank Tops and More with the Spiral Tie Dye Technique
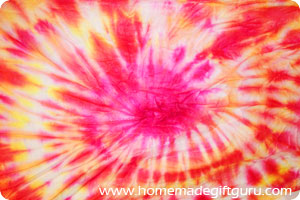
The spiral tie dye t shirt technique is likely to be the first to come to mind when you think of tie dye patterns.
It is a very popular tie dye design and can be very "60's" with bright rainbow spirals... or it can be toned down quite a bit, depending on the colors you choose.
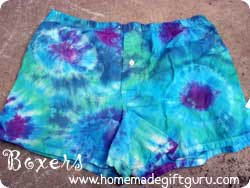
And you don't have to stop with a tie dye t shirt... you can tie dye tank tops, create adorable tie dye onesies, tie dye bedding (pillow cases are super fun and easy), scarves, hats, tote bags... even boxer shorts!
Tie dye clothes make great homemade gifts for teens, kids and adults.
Below you'll find step-by-step instructions for the spiral tie dye pattern, as well as more examples of spiral tie dye t shirts and other projects, giving you a good idea how your projects will turn out (no 2 spirals are ever exactly the same!).
If you're new to tie dye or you want the benefit of many tie dye tips, visit my tie dye instructions page first...
Tie Dye Techniques: Create a Spiral Tie Dye T Shirt
Step 1. Garment Preparation
- Gather Garments. Choose white clothes or light colored clothing, 100% cotton, linen and rayon are best.
- Pre-Wash Fabrics. Always pre-wash your fabric according to fabric directions. Do not use fabric softeners or dryer sheets.
- Soak in Fixer. Soak your clothes for 30 minutes in soda ash water (wearing gloves, stir in 1 cup soda ash per 1 gallon of water). Soda ash is a dye fixer that I highly recommend. Using soda ash water will help your dye to bind well with the fabric for high quality results.
For more info regarding garment preparation and using a fixer... visit my tie dye supplies page and my main tie dye instructions page.
Step 2. Prepare Work-space
- Protect Work Surface. Lay out plastic trash bags or sheeting (I like to cut kitchen trash bags open, lay them flat and tape down the edges).
Step 3. Bind Fabric (Spiral Binding Technique)
- Pinch and Twist. Wearing gloves (fabrics will be damp with soda ash water), start by pinching the spot you want the spiral center to be. It is often easiest to choose the center of the shirt. Twist the fabric firmly from this point.
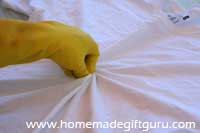
- Continue twisting fabric while flattening down the top until you have a twisted up round disc.
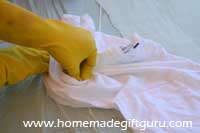
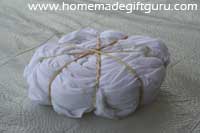
- Bind Fabric. Next, bind the fabric with 4 - 8 rubber bands (or however many you want). Use the rubber bands to keep the disc round, tucking loose bits of fabric under the rubber bands as needed.
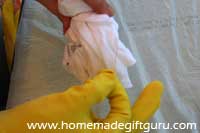
- After binding the disc with rubber bands, it should resemble a sliced up pie.
Step 4. Prepare Dye
- See tie dye instructions... use high quality dye!
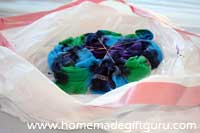
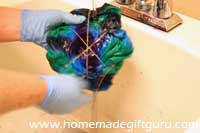
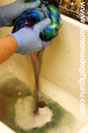
Step 5. Dye Fabric
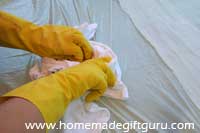
- Squeeze or pour dye as desired. Many people choose to apply a
different color to each section between the bands. Alternate colors
however you like. Allow dye to soak deep into the disc of fabric as you
apply it in various spots. Don't be shy, apply dye liberally!
Color Tip... While most colors will just tinge each other when applied side by side... You may want to avoid mixing red and green, those two colors will mix easily to create a not so attractive muddy brown!
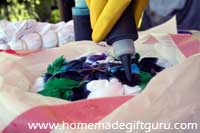
Another Helpful Tip: I use a kitchen trash bag to both contain my mess as I dye and then to wrap my project in afterward.
Step 6. Cover Fabric and Allow Dye to Set
- See tie dye instructions... Be sure to allow 24 to 48 hours "baking time" for best results.
Step 7. Rinse in Warm Water
- Rinse garments in warm water to remove excess dye. Remove any rubber bands and start to untwist as you rinse. Continue rinsing until water runs nearly clear.
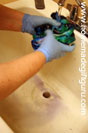
- You may notice that some fabrics as well as some colors take longer to rinse than others. When you're done rinsing each garment, put rinsed fabric on a clean plastic bag (or other plastic) and never let your various projects lay against each other at this stage, the dye will transfer at this point.
Step 8. Wash and Dry Fabric
- See tie dye instructions... don't forget to wash in Synthrapol!
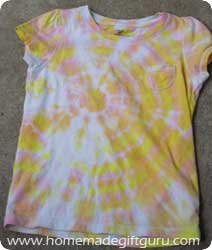
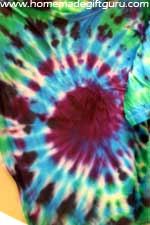 Tie Dyed T-Shirt
 Tie Dyed Baby Onesie
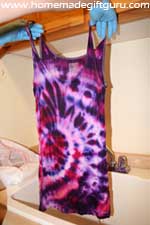 Tie Dyed Tank Top
Now you'll have some great spiral tie dye t shirts, tank tops or other clothes or gear. Remember, it's fun to experiment. It's fun to tie dye with friends. It's fun to pick your favorite colors ahead of time, so you can tie dye in the perfect color combinations, whether they'll be for gifts or for you!
Learn here what tie dye supplies I use for all my tie dying projects.
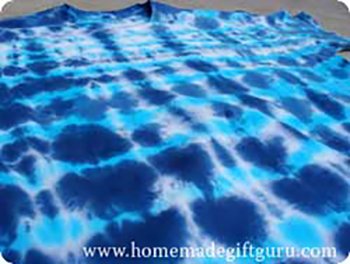
I also have tie dye instructions for featuring an awesome circle technique. Learn why this circle tie dye technique is especially perfect for beginners and homemade gifts...
Want to inspire others? Share your tie dye creations here in the HMGG gallery!
Related Pages...
Search This Site!

Recent Articles
-
Napkin Decoupage Box
Apr 24, 24 04:12 PM
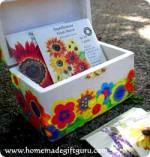 This flowery napkin decoupage box would make a cute thank you gift, birthday gift or Mother's Day gift but can be customized for any person or occasion depending on the napkin design and contents...
 -
Herb Wreath
Apr 10, 24 02:48 PM
 Learn how to make a fragrant herb wreath for a fun handmade gift right from your garden...
 -
Sock Crafts: Sock Bunny Kits
Mar 21, 24 07:34 PM
 Share the fun of sock crafts by making some of these DIY sock bunny kits! Free printable included.