Potted Candy Arrangements
Make Potted Candy Arrangements, For Simple No-Bake Sweetness
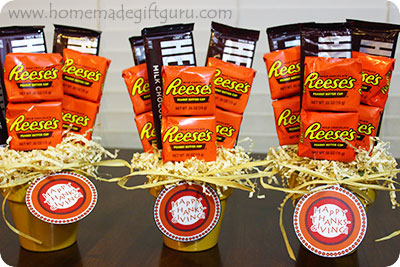
Potted candy arrangements can be made for any holiday or occasion.
Christmas, Thanksgiving, Halloween, Valentines Day, Mother's Day, Father's Day, Grandparents Day, Birthdays, Graduations, anniversaries, baby showers, weddings, teacher gifts... [deep breath!]
...these are just a few of the Holidays you can make candy arrangements and candy bouquets for.
While you can always make candy bouquets in vases or even re-purposed tin cans... I just love using little plant pots.
Below, I'll walk you through step-by-step, my process for making easy potted candy arrangements.
Not quite ready to make it? Pin it for later!

After you decide what occasion your candy arrangement will be for, you can choose an appropriate color scheme and start thinking about what types of candy come in the appropriate colors.
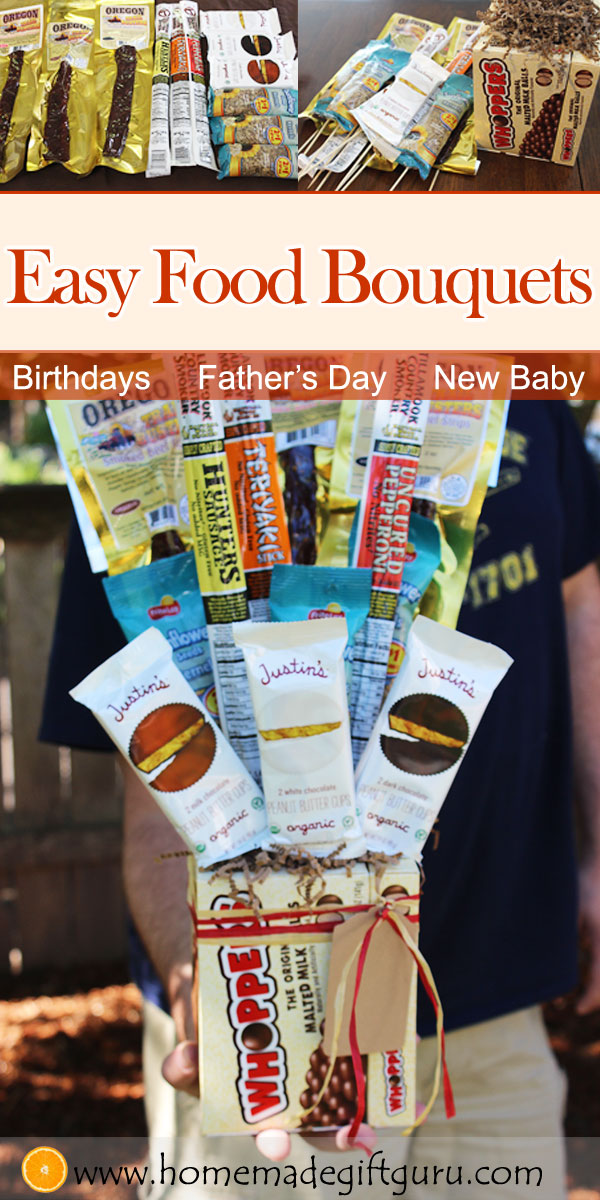
Holidays are certainly easy, because stores release a ton of candy in seasonal wrappers. You can also pick bright fruity colors for birthdays (like in this bouquet), favorite team colors for sports fans or other personalized ideas.
If you have to, you can each piece of candy in gift wrap or with card stock, for your very own unique color scheme.
Alright, let's get started!
How to Make Candy Bouquets:
There are many many ways to make candy arrangements.
For example... rather than using small pots for your containers, you can use an elegant glass vase or even re-purposed tin cans.
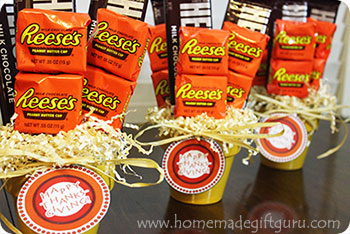
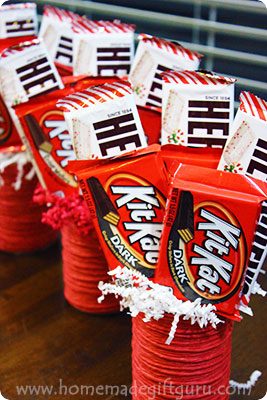
Here I'll show you specifically how to make chocolate candy bar bouquets in small 4" pots. I love using flower pots, they're so cute and easy!
Here's What You'll Need...
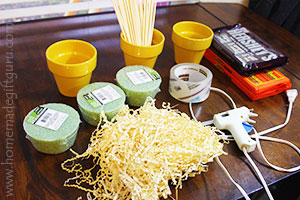
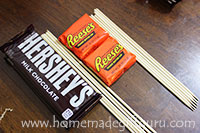
Supplies: Here's what you'll need for 3 potted candy arrangements.
- Pots. Three 4" pots (you can buy them glazed or save $ by painting Terra Cotta pots yourself)
- Foam. Three tapered floral foam pieces measuring 3.8 inches or 96mm (I get mine at my local dollar store)
- Paper Shred. Whatever color you want.
- Wooden Skewers. 18 wooden skewers (6 for each pot)
- Clear Packing Tape. I prefer to use clear packing tape to secure the candy to the skewers but you can also use a hot glue gun
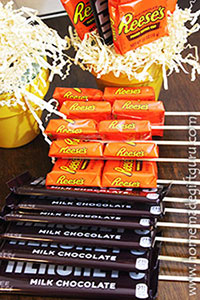
- Candy. For this project I used 9 Hershey bars and 18 square Milk Chocolate Reese's
- Optional: Ribbon and gift tag (here's the "Happy Thanksgiving" printable gift tag I used if you would like to use it too) or if you're making your candy arrangements for another occasion... here's a few other printable gift tags and gift tag templates.
Tools Needed:
- Wire Cutters. Wire cutters or heavy duty scissors capable of cutting through the wooden skewers
- Marker. A marker is handy to mark where to cut
- Hot Glue Gun. Sometimes this is handy for making sure the paper shred covers the foam insert
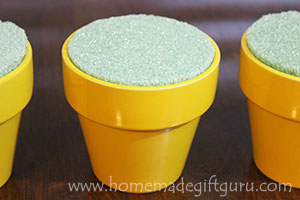
Step 1. Foam.
Insert the tapered foam pieces.
They should fut snuggly inside the pots.
Some people choose to glue them in but I haven't found this to be necessary.
Step 2. Paper Shred.
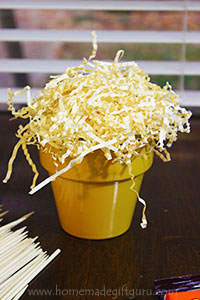
Put a handful of paper shred on top. Once you place the skewered candy into the pots, the paper shred will stay in place.
You can use a glue gun at any point to adhere globs of paper shred to the floral foam if it is loose or if the foam is showing through the shred.
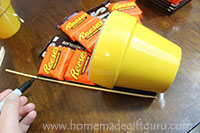
Step 3. Cut Skewers.
Use a marker to mark how much of each skewer needs to be removed.
Be sure to measure the length, starting at the top of the candy you will be using, down to the bottom of the pot.
Then use wire cutters or another suitable tool to cut each skewer to the proper length. Cut from the flat end, you'll need the point to puncture the floral foam.
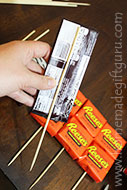
Step 4. Adhere Skewers to Candy Bars.
Use a piece of clear packing tape to adhere a skewer to the back of each candy bar. Make sure the packing tape is long enough to cover the entire back of each candy for best results.*
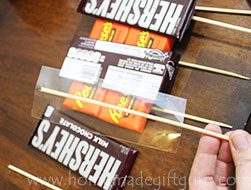
*Some people use hot glue to glue the skewer under the back flap of
the candy bar. This is fine, I've done it this way several times, but
I've grown to prefer the clear packing tape myself.
Tip: I do not recommend using off brand packing tape or regular tape as it may not be strong enough to hold.
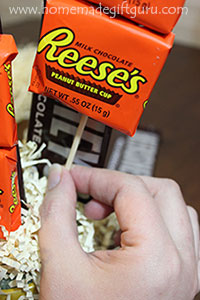
Step 5. Insert skewers into floral foam. Place the candy skewers into the foam. For this project I placed a Hershey Bar and then a Reese's right in front in three different spots, spreading them out as I liked.
That's it!
You can use this method with a huge variety of chocolate candy bars as well as non-chocolate candy.
Plus you can customize the colors and make a gift tag suitable for just about any holiday or occasion!
I hope you have a SWEET time making your own yummy candy arrangements!
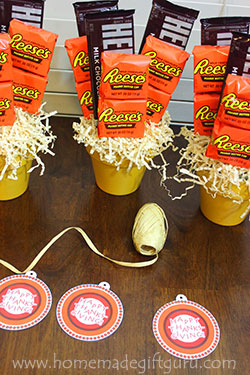
Once your candy arrangements are done, you may want to make a gift tag. The gift tags in the picture above can be found on my Thanksgiving printables page or you can find several free printable gift tags here as well as free printable gift tag templates to help you may your own gift tags.
Related Pages...
Search This Site!

Recent Articles
-
Napkin Decoupage Box
Apr 24, 24 04:12 PM
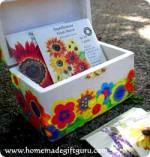 This flowery napkin decoupage box would make a cute thank you gift, birthday gift or Mother's Day gift but can be customized for any person or occasion depending on the napkin design and contents...
 -
Herb Wreath
Apr 10, 24 02:48 PM
 Learn how to make a fragrant herb wreath for a fun handmade gift right from your garden...
 -
Sock Crafts: Sock Bunny Kits
Mar 21, 24 07:34 PM
 Share the fun of sock crafts by making some of these DIY sock bunny kits! Free printable included.