Best Candy Bouquet Instructions for Thrifty Homemade Gift Ideas
Looking for a Little Super Cute and Inexpensive Homemade Gift Sweetness?
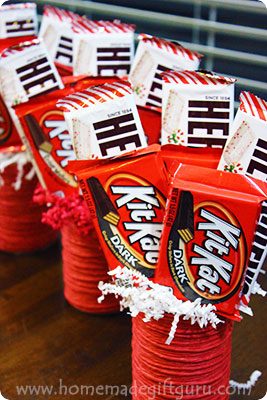
These candy bouquet instructions show you, step-by-step, how to make candy bouquets that are super cute but also incredibly thrifty.
Hint hint, it all starts with a tin can!
I love making candy bouquets... They can be big or small. They make festive additions to parties and get-togethers, and they can be designed for just about any holiday or occasion.
Kids can make candy bouquets too! When I let my kids make their own candy arrangements, I prefer to give them pre-skewered candy bars and let them put together the arrangement however they like. Then they can decorate the bouquets with gift tags, ribbon or whatever you decide to give them.
Also, if you are on a tight budget, or you just like things that are free... I've got you covered with free printable gift tags and gift tag templates!
Although their are lots of possible containers you can use to hold your candy arrangements, these particular candy bouquet instructions focus on my favorite extremely inexpensive vessel... a tin can!
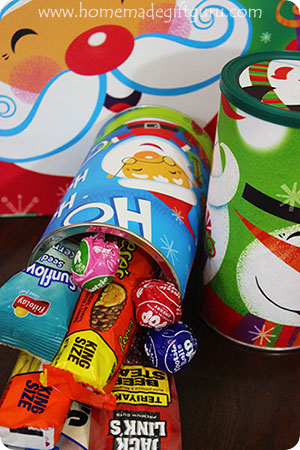
Here's how I up-cycle tin cans to make fun and creative vases and containers for my homemade gifts...
DIY Tin Can Vase...
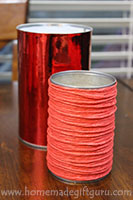
Tin cans (yep, I'm talking standard soup cans!) make awesome vases because, not only are they free, you can decorate them any way you like!
- Paper. You can cover a tin can with scrapbook paper (or with the paper from a gift bag like I did with these homemade canisters)
- Paint. Make tin cans that shine and sparkle by painting them with shiny acrylic paints or brilliant metallic spray paints.
- Fabric. You can hot glue fabric around a tin can to make a soft and trendy cover.
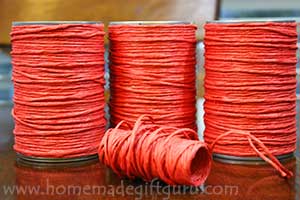
- Rope. Coil rope or craft cord around the can like I did here!
For this DIY tin can idea... Start by washing the cans inside and out. Make sure there are no dangerous sharp edges sticking out from inside or around the can.
Starting at the bottom of the tin can, place a dab of hot glue on the can and attach the end of the craft cord or rope. Start pulling your material around the can. Wrap it around and around, keeping it tight and gluing the cord here and there as needed. If the cord covering is too thin, feel free to layer as needed.
Once you have your containers completed, it's time to make a cute candy bouquet! Next, you'll find the rest of the candy bouquet instructions, showing you step-by-step how to make candy bouquets nestled inside decorated tin cans...
Candy Bouquet Instructions...
Homemade Christmas gift time is a great time to make candy bouquets!
But of course, you can make a candy arrangement for just about any holiday or occasion!
Here's a few more candy bouquet tutorials, each with something a little unique to offer...
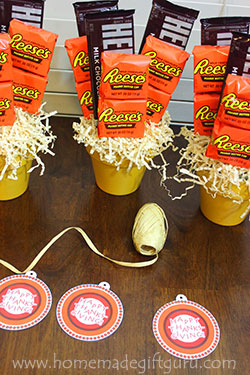
- Potted candy arrangements... Thanksgiving-themed.
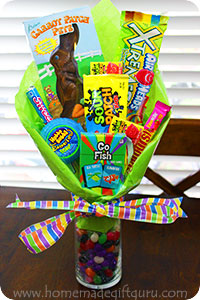
- A bright and beautiful Easter-themed candy bouquet... I love the addition of the deck of playing cards in the middle and the jelly beans that fill the clear glass vase.
- Valentine's Day Candy Bouquet... this one features a slim necked vase and just 3 pieces of candy.
- This chocolate candy bouquet is elegant enough to be given as a Wedding gift!
Please feel free to make this candy project your own by using the best colors, patterns and candy for your homemade gift occasion.
What you'll Need...
Materials:
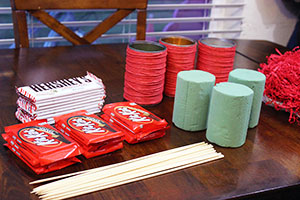
- Decorated Tin Can. See above for instructions.
- Floral Foam. They have floral foam cylinders at most craft and dollar stores or you can even use a pool noodle.
- Paper Shred. Paper shred can be found by the gift bags in craft and dollar stores.
- Wooden Skewers. One skewer for each candy. Each candy arrangement shown required 6 wooden skewers.
- Candy. Each candy arrangement shown has 6 pieces of candy. 3 short and 3 tall pieces. You may choose to make a chocolate candy bouquet like shown or choose fruit candy for a different look.
Tools and Supplies...
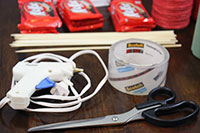
- Clear Packing Tape. This is what I like to use to adhere the wooden skewers to the candy bars.
- Tools: Scissors and a hot glue gun.
- Optional... Ribbon for decorating.
- Optional... Gift Tags
Step-by-Step Candy Bouquet Instructions...
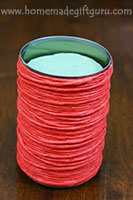
Step 1. Floral Foam.
Insert floral foam into can as shown to the left.
Tip... You can hot glue the floral foam to the bottom inside of the can if you want.
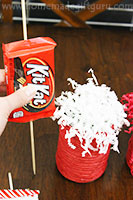
Step 2. Paper Shred.
Place a handful of paper shred inside the can, allowing it to stick out of the top (shown to the right).
Tips... It's ok if it looks a little wild. You can trim and arrange the shred more carefully after the candy is in place.
...You can also use the hot glue gun to secure the shred in a few select places if needed.
Step 3. Trim Skewers.
First determine how much of each skewer needs to be trimmed off so that the candy will sit perfectly in place.
Trim as needed.
Tip... Always trim from the blunt end if there is one so that you can use the pointy side to puncture the floral foam.
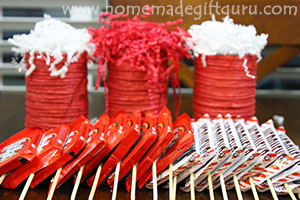
Step 4. Attach Skewers.
Using clear packing tape, adhere a wooden skewer to the back of each piece of candy.
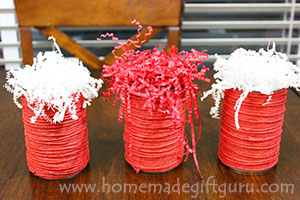
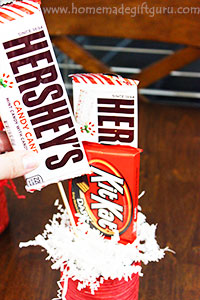
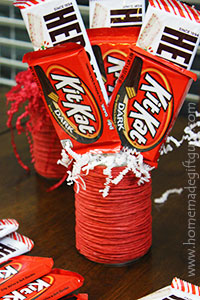
Step 5. Arrange Candy.
Starting in back, insert each candy on a stick into the floral foam until you have a beautiful candy arrangement. I used a design I am particularly fond of (three groups of one tall candy bar with one shorter candy bar in front) but you can arrange the candy however you want. There are so many options!
Step 6. Ribbon and Tags.
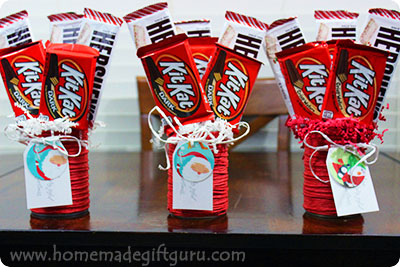
Attach ribbon, bows and gift tags if desired.
Need some gift tag ideas? To make this an even more
frugal Christmas gift, I used some leftover Christmas cards from a few
years back (see below).
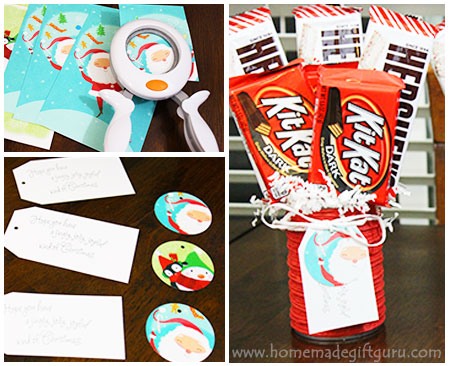
If you've followed along with the candy bouquet instructions above, your homemade candy bouquet is done!
Related Pages...
Search This Site!

Recent Articles
-
Napkin Decoupage Box
Apr 24, 24 04:12 PM
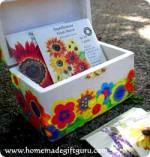 This flowery napkin decoupage box would make a cute thank you gift, birthday gift or Mother's Day gift but can be customized for any person or occasion depending on the napkin design and contents...
 -
Herb Wreath
Apr 10, 24 02:48 PM
 Learn how to make a fragrant herb wreath for a fun handmade gift right from your garden...
 -
Sock Crafts: Sock Bunny Kits
Mar 21, 24 07:34 PM
 Share the fun of sock crafts by making some of these DIY sock bunny kits! Free printable included.