Instruction for Making Gift Baskets... Like a Pro!
How to Make Your Own Gift Basket in Easy Steps
Who knew that a little instruction for making gift baskets could go so far? I certainly didn't once upon a time.
The truth is, there are just a few things to know that can make your homemade gift basket projects easy and successful.
So, you've gone and picked a great basket, perfect for your someone special. You've checked out these gift basket suggestions and picked out some fantastic personalized goodies... perfect start!
Now, if you find yourself arranging your gift basket and it's not turning out quite the way you hoped... you're not alone!
The good news..? Read my instruction for making gift baskets for the step by steps and more importantly, top tips to help make our own gift baskets look professional and coordinated.
In the following instruction for making gift baskets, you'll learn ways to pack your gift basket for optimal show, how to keep contents in good view and sitting straight, as well as how to decorate a gift basket easily and with style.
Instruction for Making Gift Baskets
Materials:
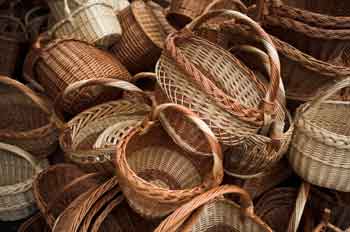
- Vessel: Basket or container of some kind. Baskets are light and inexpensive but you can also make the vessel part of the gift by using something creative such as a large mixing bowl, shoulder bag, glass pitcher, tea pot, stiff hat, sleek trash basket - whatever vessel will fit with your particular theme.
- Filler: Newspaper, packing paper, gift wrap or cellophane can be used to fill the large space that many baskets and containers have inside. Just crumple it up filling to the desired height before adding the bedding.
- Bedding: Decorative shredded paper or other stylish bedding to go under contents. This could include shredded paper, shredded plastic, tissue paper, dried moss or a keepsake such as a dish towel, table cloth, shawl, place mats, baby blanket or a bandana - to name just a few.
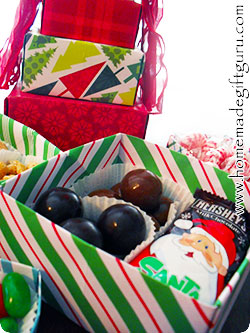
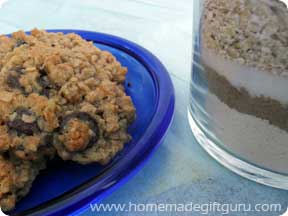
- Contents: Whatever gifts you've chosen to go in the basket, whether homemade, store-bought or my favorite, a combination of both. Choose a theme and then coordinating food, keepsakes, plants and more. Don't forget to check out my gift basket suggestions for a few fun ideas.
- Decorations: Including store-bought or hand made bows. Various types of ribbon, especially wide ribbon, wire ribbon and curling ribbon. Wire stemmed silk flowers and other design foliage.
- Wrapping: Cellophane or equivalent wrapping to keep contents in place. I've used cellophane on a roll, basket bags and my favorite, Gift Basket Shrink Wrap (for use with common blow drier - get it at craft stores). These are used when you want to keep the contents snug (I find them to be very handy in keeping contents in place and the gift looking good). For an extra fancy look, you can try using tulle fabric or another sheer fabric to wrap up your basket.
Tools:
- Scissors: For cutting paper, ribbon and/or cellophane.
- Transparent Tape: For securing contents, ribbon and cellophane.
Instruction for Making Gift Baskets:
- Prepare Materials and Goods. Choose a sturdy basket or vessel with a flat bottom so it won't fall over once filled. After settling on a theme and using the materials list above, make a note of the contents and materials you'll need to create your own gift basket - just the way you want it. Prepare and do any other prep to individual gifts that you desire (i.e. make jam, decorate jars, attach tags).
- Prepare Basket. If using an old basket, clean and if
needed, spray paint in a well ventilated area (preferably outdoors). For
deep baskets, crumple filler paper loosely and fill to about 1 inch
from brim of basket (or as high as desired). Cover filler paper with the
decorative bedding of your choice.
Note: If you can see filler paper through the sides of the basket, you must first line the basket with something decorative such as tissue paper, shredded paper or whatever you are using for bedding. - Add Contents. Add the goods and goodies you've chosen. Keep
items straight and visible. Try to arrange tall items in back, medium
height items in middle and short items in front. Arrange items until
they are pleasing to the eye.
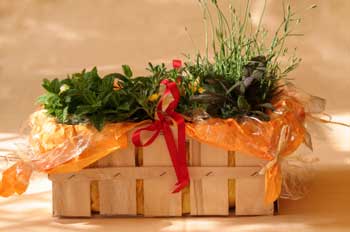
Tips: Items flopping over? Use tape, glue, glue dots, skewers and anything else you can think of to ensure your items are straight and well balanced. Use anything and everything to secure items in an attractive way. That's what the pros do! Items can be secured to each other, to the basket or even held up straight with a skewer that is taped to the back of an object and stuck into the crumpled filler paper (or into floral foam for larger baskets). Use other contents and decorative materials to disguise such supports if necessary. - Decorate. In addition to the basic instruction for making gift baskets, you'll probably want to decorate. This is really an open ended step. You can add bows and ribbon as desired. Fill in empty spots with silk flowers, dried or fake berries and other embellishments. Curl gift wrap ribbon. Make spirals from wired ribbon by wrapping it around a pencil or something similar. Add a decorative gift tag stating the name of the recipient, the theme of the basket or some cute wording. Wrap fancy ribbon around the handle. Add little decorative keepsakes if you have any. Once again, use whatever means necessary (hot glue gun, glue dots, tape) to secure items just how you dreamt them!
- Wrap Basket. This step is optional. You can give your lovely homemade gift basket as is. However, for a gift basket that is more secure and sturdy, there will be less chance of spilling if you wrap it up. You can use sheer fabric, tulle or cellophane. Gift basket bags are a handy alternative to a roll of cellophane and are now widely available in various sizes as well as gift basket shrink wrap, which is designed to shrink around the basket with the use of a blow drier.
Thanks for visiting, I hope this instruction for making gift baskets helps you make gorgeous homemade gift baskets! Feel free to share your creations here.
Related Pages...
Search This Site!

Recent Articles
-
Napkin Decoupage Box
Apr 24, 24 04:12 PM
 This flowery napkin decoupage box would make a cute thank you gift, birthday gift or Mother's Day gift but can be customized for any person or occasion depending on the napkin design and contents...
 -
Herb Wreath
Apr 10, 24 02:48 PM
 Learn how to make a fragrant herb wreath for a fun handmade gift right from your garden...
 -
Sock Crafts: Sock Bunny Kits
Mar 21, 24 07:34 PM
 Share the fun of sock crafts by making some of these DIY sock bunny kits! Free printable included.