Birthday Countdown Gift Idea
...Birthday Countdown Ideas plus Free Printable Templates
Kids love their birthdays!
...and for the first few years, each one is especially important to them. They love to dream, plan and anticipate their special day all about them.
If you have a child in your life, you may like to help them count those days by giving them a special calendar to count down with.
It could be as simple as decorating a calendar for their birth month and letting them check off the days with fun stickers... or it could even resemble a Christmas Advent Calendar, with a surprise enclosed for each day of the count down.
In fact... a homemade birthday countdown calendar, made using one of these advent calendar templates, could be your kiddo's next FAVORITE birthday adventure!
Whether you are a parent, grandparent, aunt or uncle... creating and giving a homemade birthday countdown calendar is a blast.
You may choose to make your birthday countdown last any number of days. I like to make my birthday countdowns last the same amount of days as the birthday to be celebrated.
For example...
- Four Days 'Till You're 4!
- Five Days Until You Are 5 Years old!
- 6 Days to 6!!!!!!
- Seven Day Countdown and You're 7!
- In 8 Days You'll be 8!
There's no rules to a birthday countdown, so choose the amount of days that is right for your project and have FUN!
Whatever age the birthday kiddo is turning, you can use the following tutorial and the accompanying countdown calendar templates to make it a fun and memorable birthday countdown adventure.
Not quite ready to make it? Pin it for later!

Making a Birthday Countdown...
Here are the steps to make a great birthday countdown calendar using my unique advent calendar templates.
Don't forget to leave plenty of time for both creating your calendar and then either making or shopping for the little surprises for each day!
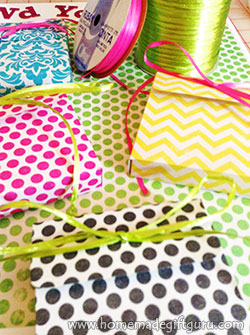
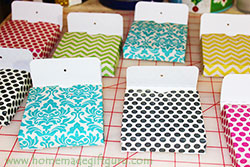
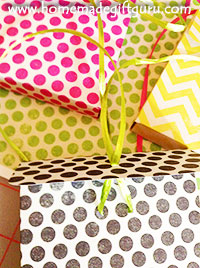
Your calendar can be made exactly like mine or customized in any way you like! I always start these projects by going to the craft store and choosing some fun and inspiring paper to make my boxes from.
Make your
countdown calendar as short or as long as you want! Following, you can
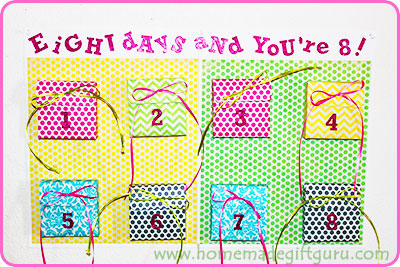
see exactly how I made the 8-box birthday countdown for my 8 year old
princess, shown below.
Note... If you don't want to make your own boxes, you can do a similar version of this project with small store-bought boxes (or by collecting the ones that come with earrings) or any other type of envelope or bag capable of storing a note or treat. Here's a few more fun "ideas for making countdown calendars".
First Gather Supplies and Tools...
You will need: Printer, paper, ribbon, stickers,
pencil, glue sticks, scissors, 1/8" and 1/4" hole punch, heavy duty glue
or mounting squares, poster board or cardboard.*
*Supplies described in more detail below...
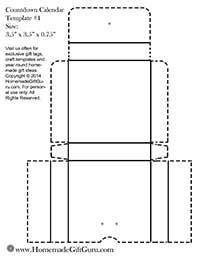
- Printer. To print the template, you will need access to a printer and a piece of standard typing paper. For this project, I chose the largest box, template design #4. I used this size because I wanted to give my daughter, who was turning 8 years old, beads and charms for making jewelry and I knew this theme would work best with the largest boxes. See all advent box templates here.
- Paper for the boxes. Choose paper that reminds you of the birthday boy or girl. Look for different colors and/or patterns that look great together. Make sure the paper is not too heavy to fold because you will be making many folds! Make sure to choose enough paper to make all your boxes. Either 8 1/2 x 11 or 12 x 12 sheets work fine.
- Ribbon, Raffia or Craft Cord (for ribbon 1/8 to 1/4 inch recommended). Adding pretty ribbon is another fun part of this project. Choose easy to work with ribbon, craft cord or raffia that matches your project. If you will be using ribbon, choose 1/8 to 1/4 inch ribbon. 3/8 inch ribbon can be used but it is more difficult to work with.
- Pencil (for tracing template)
- Scissors
- Glue sticks (for gluing the boxes together)
- Hole puncher in 1/8 inch size... I often need the standard 1/4 inch size as well, depending on the ribbon that is used.
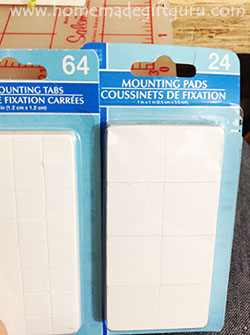
- Mounting squares or heavy duty permanent glue.
Mounting squares work great for attaching the boxes to the calendar. I've never had the boxes fall off with mounting squares but I had it happen once with regular glue. I get mounting squares at the dollar store.
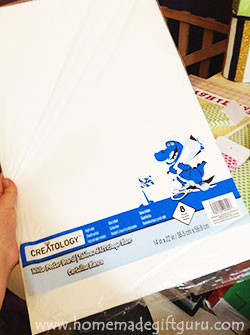
- Poster Board or whatever you choose to be your calendar base. Here I used a half sheet of poster board (I get these in packages of 8 from Michael's). You can also use card board as a base.
- Glitter, Sticker or Foam numbers and letters are convenient but optional. You can also use markers, paints, stencils etc. instead.
- Decorative Stuff. Any other decorative supplies you want to use.
To Make This DIY Birthday Countdown...
Step 1. Get All Your Craft Supplies Ready
Tips... again, start by choosing some awesome decorative paper that suits the birthday girl or boy. Make sure you get enough pieces to make the desired number of boxes. Remember, both standard and scrapbook paper work well, as long as they are not too flimsy to make boxes or too thick to fold. You may also want matching embellishments and stick on numbers.
Step 2. Print Template
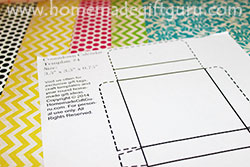
Print a copy of the box template you will need from this advent calendar templates page.
For this project, I chose the largest box design, template design #4, but you can choose a smaller size if that works better to you.
You may want to choose size based on what types of surprises you plan to enclose for each day. I had big plans for this one!
Step 3. Prepare Template
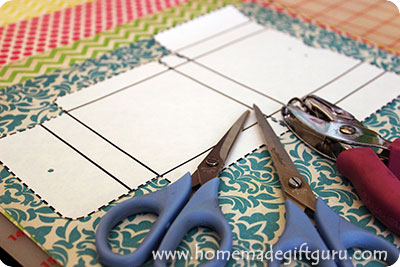
Cut template and fold flaps. To prepare the template itself for tracing onto pretty paper, you will need to first cut around the outside of the dotted lines and then fold along solid lines.
Tip... I always fold both ways so I can first use the solid lines for folding away and then easily fold back the correct way.
Step 4. Trace Template
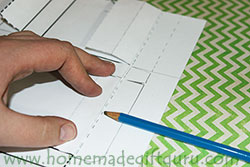
On the back of the decorative papers you chose, trace a solid line around the outside of the template.
Then carefully fold each flap up and make a dotted line against each fold (as shown). Do this for each box.
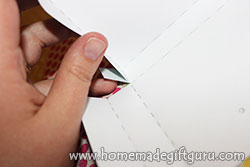
Step 5. Cut and Fold (and punch holes if desired)
Cut out each traced template. Fold along dotted lines.
This is a good time to punch holes (where indicated by grey dots on the template), only if you will be using ribbon to close the boxes.
See step 7 for more info on closing the boxes with ribbon vs. closing them with re-positionable glue dots or tape.
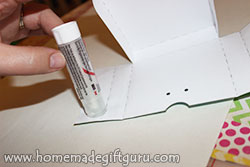
Step 6. Glue Boxes Together
For each box, first glue the small reinforcement tab, as shown below. Then apply glue to the largest flap and press it onto the sides and across the back.
Step 7. Thread the Ribbon (optional)
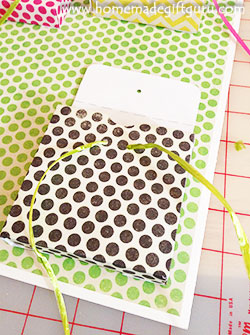
Decide whether you want to use ribbon to close the boxes (as I did here) or you may choose to use re-positionable glue dots or re-positionable tape.
Re-positionable glue/tape is best for super young kids, as the boxes will be simpler to open.
If you want to use ribbon, the easiest time to punch holes is in step 5.
Now you will want to thread each end of your ribbon through the double holes on the base... but don't close the boxes yet. Your ribbon will be hanging and the boxes will still be open.
Tip... For extra strength, you can use hole punch "reinforcement labels" especially on the underside of the big flap (but this step is optional). They can help to prevent the boxes from tearing when the ribbons are tugged.
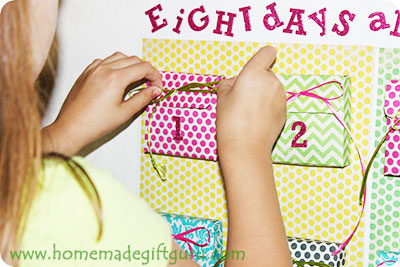
Later... when you are ready to close the boxes, you will thread both ends through the single hole (as shown) and then tie a bow without the usual starting knot.
...That way, the child can tug each end of the bow and it will unravel without making a knot!

Step 8. Make the Base
Fix up the base of your calendar.
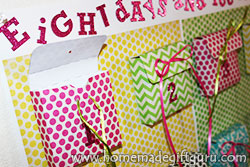
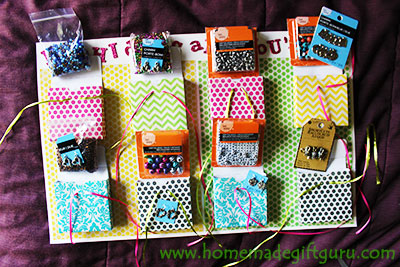
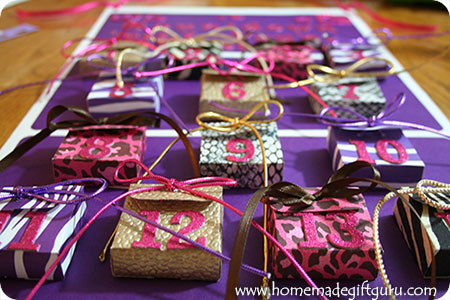
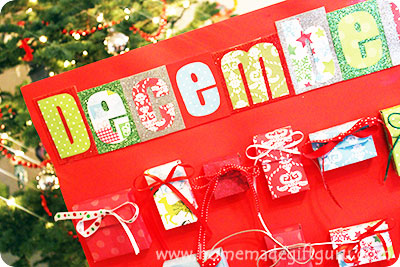
For this birthday countdown project, I took a half sheet of poster board and covered it in decorative paper. I then used glitter letters to label the calendar "Eight Days and You're 8!"
Step 9. Glue Calendar Together
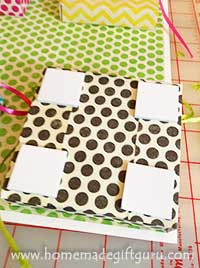
Place each box where desired. Glue the boxes down with heavy duty glue, or adhere with wall mounting squares.
Wall mounting adhesive squares have worked really well for me and they are no fuss/no mess.
You must choose a strong adhesive to make sure the boxes don't fall off when you put the surprise inside.
Step 10. Decorate as Desired
I used stick-on numbers for each day as well as stickers for my countdown title (ex. 8 Days 'Till You're 8). You can also use stencils or just markers if you prefer.
Step 11. Put Surprises in Boxes
Fill the calendar with your chosen surprises and close the boxes!
Tips for Filling a Countdown Calendar...
Make sure your gifts will fit. If you will be buying treats or gifts, bring a sample box with you to the store so you are 100% clear on the maximum size surprises you can fit.
Be sure to end the birthday countdown with a bang! It's a good idea to end the calendar with something extra fun such as...
- Treasure Hunt. On the last day of the calendar, which will be the child's birthday, you can enclose treasure hunt clues leading to a special birthday gift.
- Fun Outing Surprise. Another idea for the last day of the countdown is to enclose a note that states an awesome outing planned (ex. bowling, horseback riding, movies etc.).
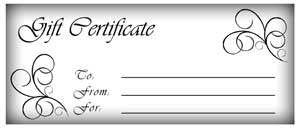
- Make a Gift Certificate. Also, for some kids (especially older ones), money to spend at the toy/craft/clothing store with a homemade gift certificate for a trip to the store, is as awesome as it gets!
You can also choose a theme for the gifts like I did! I gave my daughter jewelry making supplies, because that's what she was really into at the time. I put together some more ideas below...
There are several different directions you can go when it comes to filling a homemade advent-style calendar with gifts...
Simple and Sweet. One way is to put one small piece of chocolate or candy in each box.
Small Random Gifts. Another way is to pick random gifts that are sized just right to fit inside the calendar...
Tip... Whatever the box size you choose for your birthday countdown calendar, I recommend taking a sample with you to the store so you can test for size.
Thoughtful. You can make any gift extra thoughtful by including a note of some sort, a special image or photo, a special message, quote or saying.
Theme. For birthday countdown calendars in particular, I like to choose a theme for the gifts. It's like spreading a big gift over the few days before the birthday. Here are some themes you may like...
Gift Themes Geared More Toward Girls...
- Jewelry Making Supplies: beads, charms, cords
- Hair Stuff: Clips, soft head bands, bows, barrettes, hair crayons, ties, wraps, hair conditioning packet (for older girls)
- Earrings: Buy the sets of 6 or 8 pairs and gift one pair a day. You could even create your own little cards to place the earrings through with include a heart-felt message written right on the card.
Gift Themes Great for Boys and Girls...
- Arts and Crafts. Any arts and crafts supplies, something new and different for each day. For example, stickers, buttons, glitter, stick-on gems, scrapbook embellishments, stamps.
- Legos. Mini-figures or small kits spread out.
- Stickers. Sticker packs for each day.
- Cars. A different car each day.
- Magnets. Homemade or store-bought refrigerator magnets, one per day.
- Figurines. Small figurines such as dinosaurs, bugs or little horses. One different figurine for each day.
Whatever you choose to include, I hope you and your gift recipient enjoy this project to the fullest!
And be sure to share your creation here in the HMGG gallery!
Related Pages...

Search This Site!

Recent Articles
-
Napkin Decoupage Box
Apr 24, 24 04:12 PM
 This flowery napkin decoupage box would make a cute thank you gift, birthday gift or Mother's Day gift but can be customized for any person or occasion depending on the napkin design and contents...
 -
Herb Wreath
Apr 10, 24 02:48 PM
 Learn how to make a fragrant herb wreath for a fun handmade gift right from your garden...
 -
Sock Crafts: Sock Bunny Kits
Mar 21, 24 07:34 PM
 Share the fun of sock crafts by making some of these DIY sock bunny kits! Free printable included.