Valentine Countdown Calendar
A Creative Homemade Valentine Gift Idea that Kids Love...
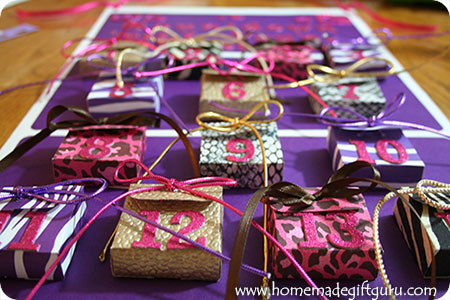
Imagine making your own Valentine Countdown Calendar for your favorite little Valentine!
...You could choose your own tiny gifts for each day and enclose your own special messages.
I made this dream come true... and I have to say, it was super fun to make and even more fun to give to my DD!
My favorite part of the gift was the little loving notes I put inside each day!
I love crafting after Christmas. The weather is cold and the business of the season has come to an end. So... IMO, this project is well timed.
Plus, compared to the traditional 24 day Christmas Advent Calendar, the Valentine version is much shorter. You can start the countdown on February 1st, for example, or you can make it even shorter if that works better for you.
There are no rules for this one! It's just a fun little countdown to share with someone you love.
Make this for your kiddos, or grand-kiddos, nieces, nephews... whoever you want to make a Valentine countdown for. You can even make a romantic version for your significant guy or gal!
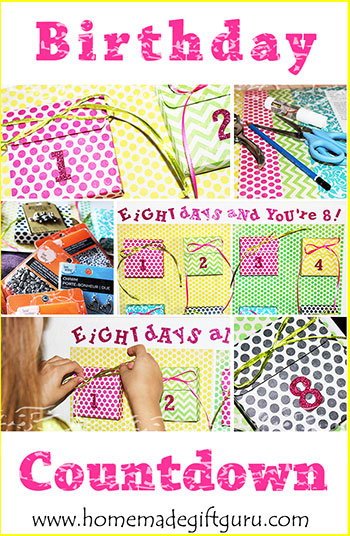
Psssst... This birthday countdown was fun too!
This Valentine Countdown Calendar Uses Free Templates...
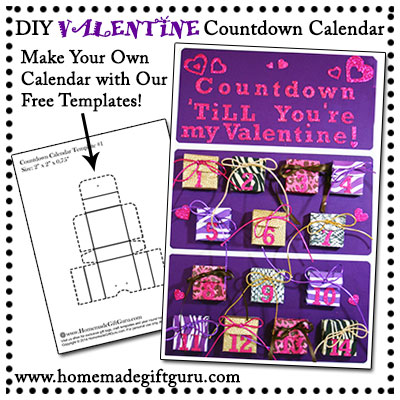
Over the years, I have made several advent calendar templates available for you to use!
For this project I use template #1, which measures 2"x2"x0.75".
There are a tun of ways you could set up your Valentine countdown calendar but here is how I did this one...
See how I made mine below, and then make yours using paper and ribbon that inspires you!
First Gather Supplies and Tools...
You will need: Printer, paper, ribbon, stickers, pencil, glue stick, scissors, 1/8" and 1/4" hole punch, heavy duty glue or mounting squares, poster board.*
*Supplies described in more detail below...
- Paper for the boxes
Tips... When choosing paper, keep in mind that thinner paper is easier to fold while thicker paper makes sturdier boxes. - Coordinating Ribbon, Raffia or Craft Cord
Tips... Adding pretty ribbon is another fun part of this project, but I recommend choosing thin, easy to work with ribbon, craft cord or raffia. You will be pulling it through small holes and tying little bows with it. 1/8" to 1/4" ribbon, craft cord or raffia works great with these little boxes. - Pencil (for tracing template)
- Scissors
- Glue sticks (for gluing the boxes together)
- Hole punchers in 1/8 inch size... I often need the standard 1/4 inch size as well, depending on the ribbon that is used.
- Mounting squares or heavy duty glue. I get mounting squares at the dollar store, they are easy to work with and they hold up well.
- Poster Board or whatever you choose to be your calendar base.
- Glitter, Sticker or Foam numbers and letters are convenient but optional. You can also use markers, paints, stencils etc. instead.
- Decorative Stuff. Any other decorative supplies you want to use.
Valentine Countdown Calendar Step-by-Step...
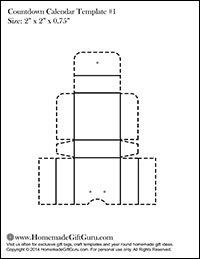
1. Print Template. Print template on standard typing paper - here is the size I used or go to advent calendar templates page for more sizes, this is a fun project to customize to your liking!
2. Cut and Fold Template. Cut along the outside edge of the dotted lines. Then fold along the middle of each solid line. Easiest way to fold is first fold in on the blank side and then flatten and fold back the other way, in on the printed side.
3. Trace Template onto Paper. On the back of each paper, trace a solid line along the outside of the template. Then lift each flap up and make a dotted line along the solid fold lines as shown below.
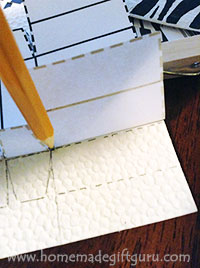 Trace around outside of template
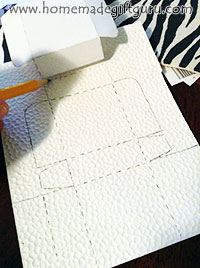 Make dotted lines to show where to fold
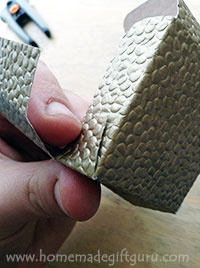
4. Cut and Fold Paper. After the template has been traced onto pretty paper...
- Cut along the outside solid lines.
- Fold each template along the dotted lines.
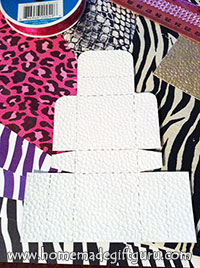
Tip... Again, I just find it easiest to fold first the wrong way, then fold back toward the side with the dotted line so your box starts to look like a box.
5. Punch Holes. This is the best time to punch the 3 holes where indicated.
Start with 1/8 inch punch. If the ribbon requires it, use 1/4 inch on the outer flap to accommodate both ends of the ribbon going through one hole.
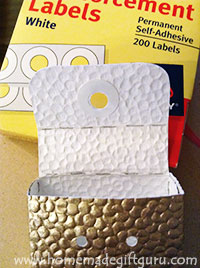
Tip... Re-enforcement Labels.
If you want added sturdiness, re-enforcement labels, like the ones shown, work great to avoid unintentional tearing during bow tying and untying.
For Very Little Kids? You can skip the hole punching now and rather than ribbon, you can later use a repositionable glue dot to keep the flaps closed until your little Valentine opens each day's box.
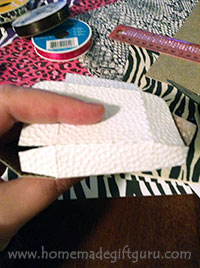
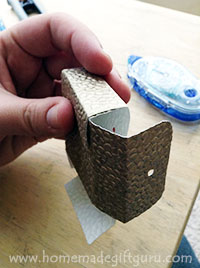
6. Glue the boxes together. I find that a glue stick works great for this, because you can still make small adjustments to the placement of the flaps for a few seconds after you glue them together. The little flaps go in between the body and the main flap to add support.
7. Ribbon. Cut a piece of ribbon or craft cord for each box to about 20 inches, maybe a little shorter. It is better to cut them too long and trim later than to get them too short. Run each end from inside the box and out evenly.
...You can then put both ends through the single hole on the outside flap, as shown below (or wait until everything is done and the boxes are filled).
When Tying the Bow... later, after you place a goody inside the box, it will be time to tie a final bow on your closed box. You should tie it without first tying a knot. That way, all your Valentine has to do to open it, is pull each end of ribbon at the same time. The bow will easily unravel and they can open the flap, without facing the task of removing a knot.
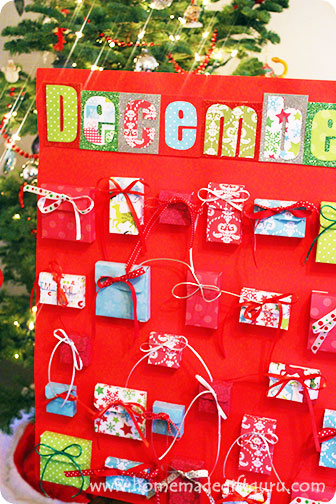
8. Position Boxes on Base. For this project I used a half piece of poster board. You could also use card board for your base and then cover it with non-glossy gift wrap or scrapbook paper.
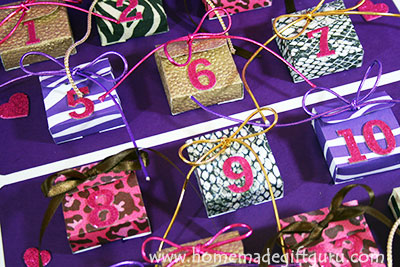
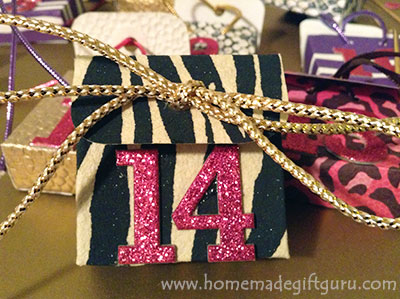
Start placing everything where it will go so you can plan out any remaining details of your design. I glued purple scrap book paper to the white poster board and then used lots of fun glittery stickers to finish the design of my Valentine countdown calendar.
9. Glue Boxes to Base. Once you know where everything will go, glue each box down securely.
Tips... I like to put a mounting square on each corner to adhere each box. It's no fuss, no mess and strong enough to hold the box once they have a goody inside. You can of course use your favorite heavy duty glue if you would prefer. Whatever you use, make sure the boxes will hold!

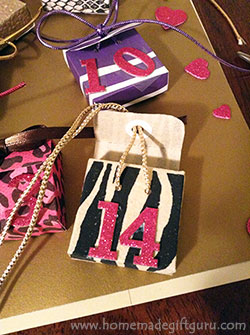
10. Finishing Touches. Now you get to put the finishing
touches on your Valentine countdown calendar.
You can write or use stick-on numbers for each day of the countdown.
You can also punch a couple holes in the corners for
ribbon to hang it like a calendar.
Now the Goodies!
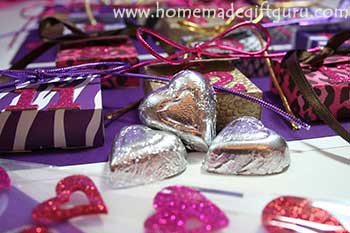
Picking out the goodies for your Valentine Countdown is awesome fun! I like to bring a sample box to the store, to make sure I don't pick anything out that won't fit.
I always include Valentine messages of some sort! It's fun for me and fun for my kids. For example, a small paper heart for each day with messages like "Be Mine" and "I love your smile!".
...The last day could be something extra special!! After-all, anticipation has been developed and it's finally Valentine's Day!
...For more ADVENTURE on Valentine's Day Morning: On the last day write out a message saying something like "Will you be my Valentine? If your answer is YES, go look in the kitchen...". That's were you put a little Valentine's Day gift basket or a chocolate heart or something really cool for Valentine's Day. My oldest loved that last year. Always finish off with something extra special!!!
Besides a SWEET message each day, here are some small gift ideas for your Valentine countdown...
- Stickers
- Temporary Tattoos
- Small Wrapped Chocolates
- Tiny Bags of Candy
- Tiny Toys ...(for example, the ones from the quarter machines will often work but you have to take them out of the plastic container because it is a little too big one way)
Important... Again, bring a sample box with you to the store to make sure each goody will fit! :)
Not Just for the Kids!
A romantic themed countdown calendar could be a great homemade gift idea leading up to a proposal, an anniversary or a very special Valentines Day.
You could enclose a variety of poems, love notes, a special photo, tickets to a movie or play, dinner date invite, treasure hunt clues or clues about something special to come, homemade treats, love coupons etc... or stick to a romantic theme such as:
- Reasons I Love You!
Related Pages...
Search This Site!

Recent Articles
-
Napkin Decoupage Box
Apr 24, 24 04:12 PM
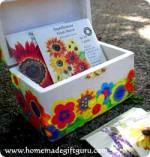 This flowery napkin decoupage box would make a cute thank you gift, birthday gift or Mother's Day gift but can be customized for any person or occasion depending on the napkin design and contents...
 -
Herb Wreath
Apr 10, 24 02:48 PM
 Learn how to make a fragrant herb wreath for a fun handmade gift right from your garden...
 -
Sock Crafts: Sock Bunny Kits
Mar 21, 24 07:34 PM
 Share the fun of sock crafts by making some of these DIY sock bunny kits! Free printable included.