Simple Decoupage Frame Gift
Create Meaningful Homemade Gifts on a Budget with These Simple Decoupage Frame Ideas...

This simple decoupage frame makes an easy homemade gift idea and costs hardly anything to make.
The basic idea is to find a cheap photo frame with plenty of flat surface area and pair it up with a great piece of decorative paper (which you can find in most any craft store).
I used a piece of scrap book paper for this decoupage project, however, there are many types of paper you can rummage through when planning your project.
Try scrap book paper, paper sold for decoupage, gift wrapping paper, wall paper, magazine pages, pages from an outdated calendar... or any paper that won't bleed.
You can finish your simple decoupage frame by framing something beautiful, cute and/or meaningful to your gift recipient.
Here's a few things you can frame OTHER than photographs...
Framing photos is always well worth the effort. But don't stop there. It's a lot of fun to frame other things too like:
- Dried pressed flowers
- Scrap book charms and embellishments
- Post cards or greeting cards
- Art made by your child/children/grandchildren
- Inspirational or Favorite Quotes printed from your computer
- Stamped art
- Rub On Art or Rub on Words
- Fancy Stickers
- Memorabilia
- Bible Verses
- Needle Art
- Scrap book pages
- Prints of famous paintings
- Computer printed pictures or clip art
How to Make a Simple Decoupage Frame
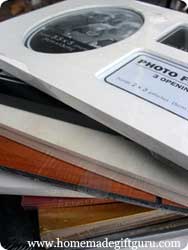
Supply Sources: For this decoupage project, the photo frame came from the $1 dollar store and the decorative paper came from a local craft store for less than $.50. The photo frame inserts were printed on a home printer (more about that in Step 6 below).
Note: Although this frame came from the dollar store... other places to find thrifty photo frames include craft stores, yard sales, discount stores, sales and your own garage, where you might have set aside a less than gorgeous frame waiting for a makeover.
Supplies:
- Photo frame: with significant surface area to put designs on
- Decorative paper: one piece at least as large as your frame
- White craft glue or decoupage medium
- Water based varnish:
see decoupage supplies for more on varnish - Optional: Craft cord to match paper
Tools:
Scissors, pencil, foam brush, wide soft paint brush, newspaper (to protect your work surface from glue and varnish), soft cloth or paper towel
Instructions:
- Preparation. Step one is to prepare your picture frame for decoupage.
An unpainted wooden frame should be primed with acrylic primer or painted with acrylic paint. If your frame is already painted, simply clean it with a soft cloth. Other materials besides wood may need special treatments but most decoupage preparations are simple.
See decoupage instructions for more on preparation for special surfaces.
Tip: If you plan to paint any part of the frame not going to be covered by decorative paper, do so before gluing your paper down. Use masking tape to protect the edges of surfaces that you do not wish to paint. - Cut Paper to Size. Trace the front panel of the frame
onto the back of your paper. Cut your paper to the exact size of your
frame (or whatever size you would like).
Cutting Tips: Cut around the outside first. For the center opening(s) poke a whole from above, then bring your scissors up from underneath to cut out the inner squares. - Moisten Paper. To avoid wrinkles, especially in thicker paper, such as scrap book paper... it can be helpful to barely moisten your paper
with a spray bottle set on mist.
...The paper will curl up as the fibers tighten and then flatten out as the fibers relax. This can prevent wrinkles when the paper and glue dry. - Glue Paper. Gently line paper up exactly where
you want it (moist paper is very delicate so take care not to tear or scuff
the paper).
Start by gluing a corner or edge in place. Work you way across, gluing the entire back in place and gently smoothing the paper with a soft cloth or clean finger tips.
Allow everything to dry completely. - Seal Project. The last step is to seal the frame. Apply a thin layer of varnish over the entire face of your frame, using a soft wide brush. Allow to dry thoroughly. Once dry, repeat if desired.
Optional Steps:
It can be fun to embellish your picture frame further. The photo frame above has craft cord glued around the edge and around picture openings.
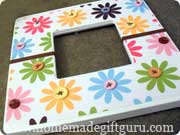
...and to the right is a simple decoupage frame with buttons glued in the center of each flower, to enhance the paper pattern.
You can embellish your frame further using things like buttons, sequins, beads, fake gems, glitter and other paper art embellishments.
...or leave your frame simple like this Quote-a-day frame I made for someone very special to me!
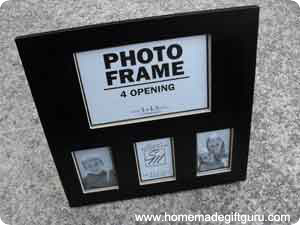
For the Photo and the 3 Single Word Quotes...
Above, I gave you a few ideas for what to frame. Now here's how I made the word quotes for this particular project.
The photo of a Tulip you see in the featured frame came from stockvault. It's easy to use your own pictures but when you are in a hurry or in need of a printable photo, website like these can be very handy.
The photo was printed on a cream colored linen-textured paper along with the words "Love" "Joy" and "Peace" using the font Harrington. They were then cut to size and inserted in the frame like you would photographs.
Tip: This can be done using a word processing program such as Microsoft Word (or Open Office for a free alternative) or a graphics program such as Adobe Photoshop.
Whatever you decide to frame, I hope you enjoy creating your simple decoupage frame... and feel free to INSPIRE FORWARD by sharing a photo of your finished homemade gift in the HMGG gallery!
Related Pages...

Search This Site!

Recent Articles
-
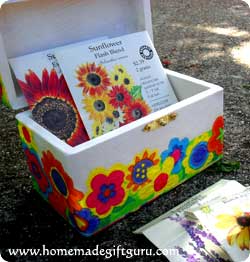
Napkin Decoupage Box
Apr 24, 24 04:12 PM
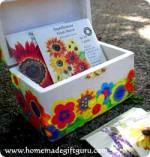 This flowery napkin decoupage box would make a cute thank you gift, birthday gift or Mother's Day gift but can be customized for any person or occasion depending on the napkin design and contents...
 -
Herb Wreath
Apr 10, 24 02:48 PM
 Learn how to make a fragrant herb wreath for a fun handmade gift right from your garden...
 -
Sock Crafts: Sock Bunny Kits
Mar 21, 24 07:34 PM
 Share the fun of sock crafts by making some of these DIY sock bunny kits! Free printable included.