Advent Calendar Templates for Creating Unique Countdown Calendars
Do You LOVE a Little Homemade Excitement and Anticipation?
These advent calendar templates will help you create the most unique countdown calendars ever!
Perhaps you got here from one of the countdown calendar ideas on this website, or perhaps you have your own calendar in mind and are looking for unique templates...
Either way, these templates can be used to make fun gift boxes to attach to your calendar.
A few specific ideas?...
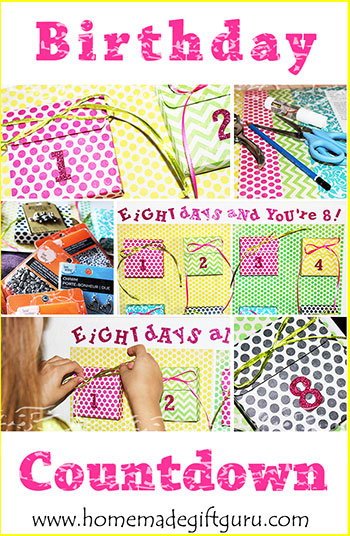
You can use these free craft templates to create a one-of-a-kind birthday countdown, or for counting down the days to a special event (such as going to Disneyland)...
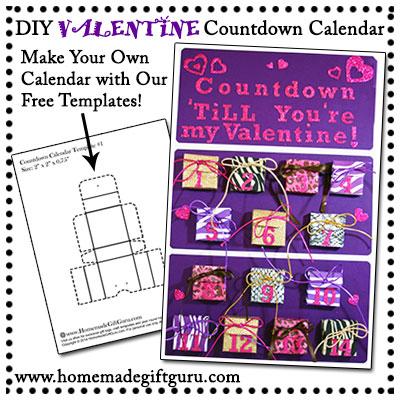
Of course, they work for holidays, such as Christmas or Valentine's Day as well!
By using these templates, you get to choose your own color scheme, patterns, paper and countdown calendar gifts.
You can create a countdown for any event or occasion that would benefit from a little fun and exciting anticipation!
Advent Calendar Templates
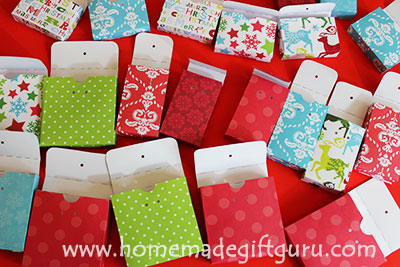
The following craft templates are used to create a box that attaches to your calendar and is capable of holding a small gift for each day of your special countdown.
There are five advent calendar template sizes to choose from...
- You may like to choose just one template for your project and stick to that one (like the birthday countdown bottom left) or
- Mix and match sizes (like the whimsical Christmas countdown bottom right).
Here are a couple examples of two different looks using the advent calendar templates from this page...
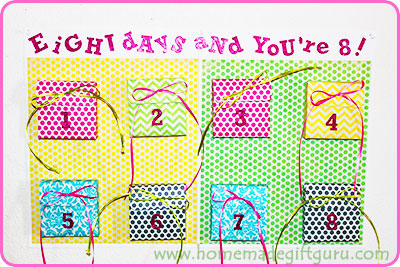
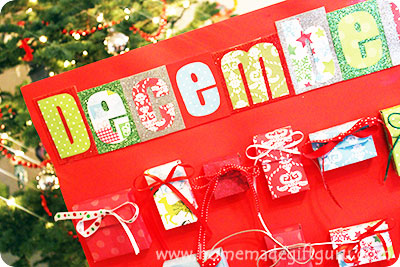 This countdown uses an assortment of all 5 templates for a whimsical look.
Please note that these are my exclusive craft template creations. All templates copyright © www.homemadegiftguru.com and are provided for personal and gift giving use only. All Rights Reserved.
How to Print Advent Calendar Templates...
Decide on a Size. If you aren't following specific instructions for one of the countdown calendars provided, you should start by deciding what template(s) you want to use for your project. If you need specific countdown calendar ideas, click here.
Print Template. Once you know what size(s) you need, click on the desired advent calendar template. A new window will open with a printable .pdf of your chosen template. Print it onto standard typing paper.


How to Use Advent Calendar Templates...
The following tutorial simply focuses on how to create boxes using the templates on this page.
Supply List:
Please refer to individual countdown calendar ideas for the other supplies you may need to make the rest of your calendar.
- Printed template... simply print the template on standard typing paper.
- Pretty Paper... One 8 1/2 x 11 in. sheet makes one box. One 12 x 12 in. sheet makes at least 2 boxes, sometimes 3. Thinner paper is easier to work with but thicker paper makes a sturdier box.
- Pencil and eraser
- Scissors
- Glue stick or your choice of glue.
- Optional... hole puncher and ribbon... 1/8" hole punch and 1/8" to 1/4" ribbon, raffia or craft cord.
Tips... If you use 1/4" ribbon, you may need a 1/4" hole punch as well. Also, rather than ribbon, you can use Velcro or even a re-positional glue dot to keep the boxes secure.
Advent Calendar Template Instructions...
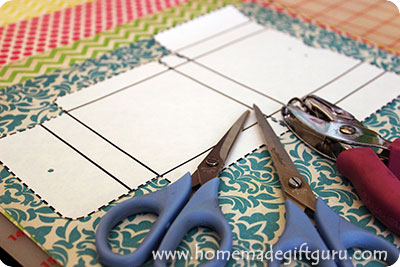
1. Prepare Template. When you are ready to use your template, cut along outside of dotted outline. Punch holes where indicated if desired. Fold along all the solid lines. Crease the folds well.
Tip... If you fold the flaps the wrong way first using the solid lines for a guide, it will then be super quick and easy to fold back the correct way.
2. Trace template to paper. Lay template down against the back of your decorative paper. Trace with pencil along outside of template. Draw inside each hole punched hole. Fold each flap of the template up and make a dotted line.
3. Cut and fold template. Take your new traced template and cut along outer solid line. Punch holes if desired. Fold along dotted lines... again, fold away and then back in for easiest method.
Tip... The more carefully you do all this, the more perfect your box will turn out.
4. Make box. Now fold your box together and glue... Glue little flaps on each side. Then apply glue to the largest flap and adhere across the sides and back. Allow to dry.
Tip... A glue stick works well because it can still be slightly manipulated for a few seconds after you stick the box together.
5. Ribbon. If you want to use ribbon to close the boxes, this is a good time to get it started. Thread each end of ribbon from inside the box, out of each of the two holes. Let the two ends hang until you put your gift inside.
Once your gift is placed inside, you can close the flap and pull both ends through the single hole in the flap. Tie a bow and you're done! Avoid tying any knots, which will make opening the box difficult.
If you've followed these instructions, you now have an awesome new box that is ready to adhere to your homemade countdown calendar!
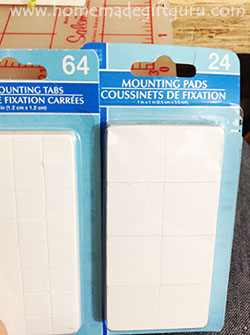
When Gluing Boxes to a Base... It is very important that the boxes don't fall off when you add the weight of a gift or when someone tugs on the ribbon to open the bow.
You must use heavy duty glue to apply the boxes to your calendar base.
My favorite has been mounting squares. In my experience, they are easy, mess-free and strong enough for these projects. I get mine from the dollar store and they work just fine.
That's about it! Once you have all your boxes made, you can mount them securely to paperboard or a piece of cardboard. Then decorate your countdown calendar however you want.
Related Pages...

Search This Site!

Recent Articles
-
Napkin Decoupage Box
Apr 24, 24 04:12 PM
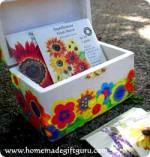 This flowery napkin decoupage box would make a cute thank you gift, birthday gift or Mother's Day gift but can be customized for any person or occasion depending on the napkin design and contents...
 -
Herb Wreath
Apr 10, 24 02:48 PM
 Learn how to make a fragrant herb wreath for a fun handmade gift right from your garden...
 -
Sock Crafts: Sock Bunny Kits
Mar 21, 24 07:34 PM
 Share the fun of sock crafts by making some of these DIY sock bunny kits! Free printable included.